Dashboard overview
The dashboard is organized around a left sidebar and a main content area. The sidebar is the primary navigation: Overview, Team, Datasets, Locations, Search, Audit, and API Docs.
Most operators spend their time in three areas: Datasets, Locations, and Search. Organization admins also use Team and organization settings.

Organization and users
Organization admins can update organization basics and manage users in the Team section. Editors only need their login and the datasets assigned to them.
Edit settings to update the organization name, slug, and active status.+ Add user. Assign the correct role immediately.admin for organization operators, editor for data entry, and viewer for read-only access.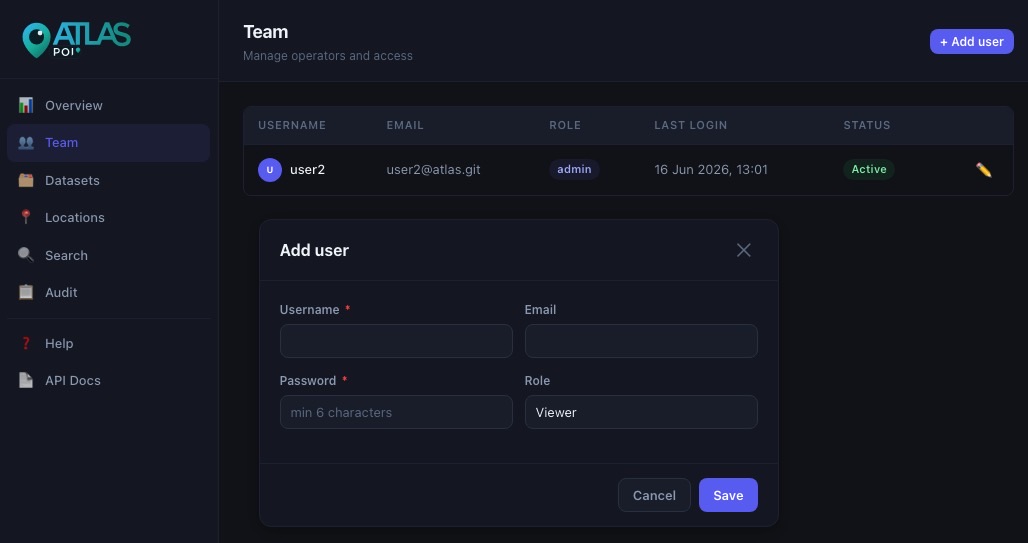
Datasets and settings
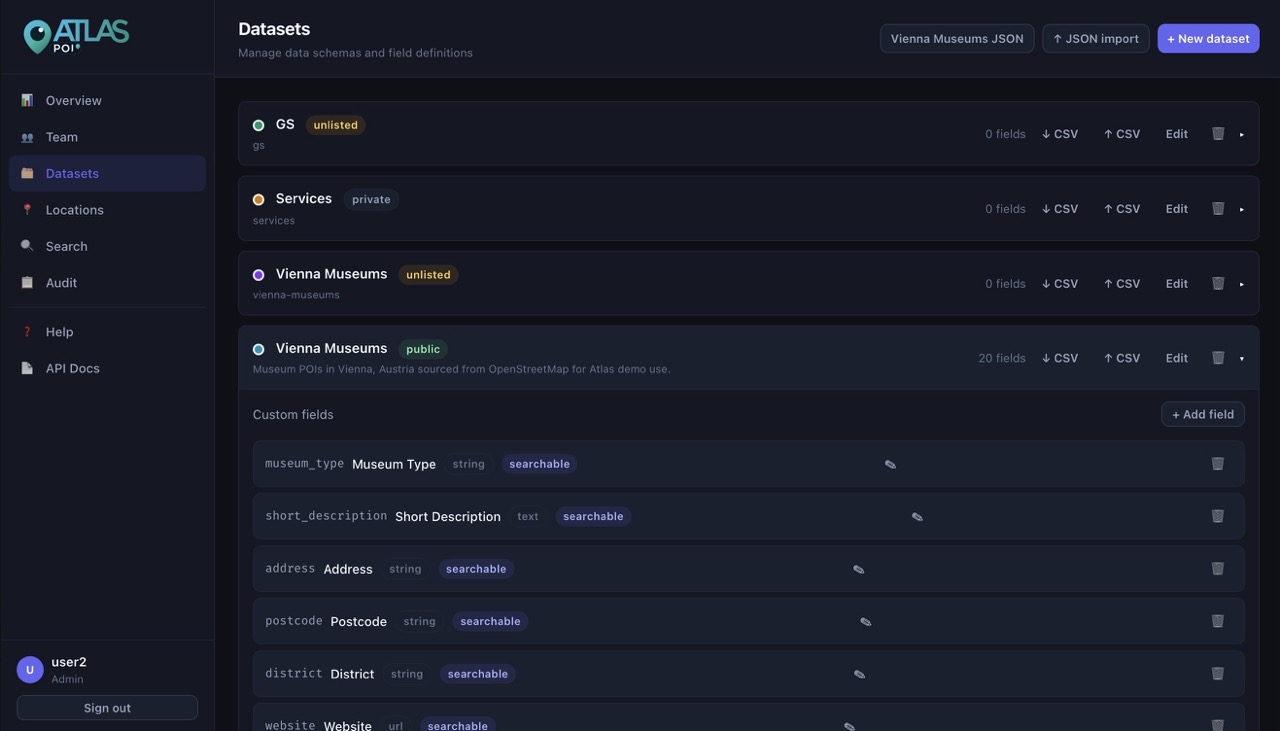
A dataset is the logical container for one category of POIs — sites, entrances, sections, landmarks, or any other geospatial entity type. Each dataset has its own icon, color, visibility, and QR redirect setting.
- Use separate datasets when records have different meaning or different custom fields.
- Set the dataset color intentionally. That color is used for map pins and the public detail page header.
- Set visibility to
publiconly if the dataset should appear on the public search page and public API.
QR redirect target
Each dataset has a QR redirect target setting that controls where a scanned QR code sends the visitor. Choose from:
| Option | Where it redirects |
|---|---|
Detail page (default) | The Atlas public detail page at /p.html — shows org/dataset branding, all field values, and "Open in maps" buttons. |
Google Maps | Opens the POI coordinates directly in Google Maps. |
Apple Maps | Opens in Apple Maps (works best on iOS/macOS). |
OpenStreetMap | Opens the location in openstreetmap.org. |
Waze | Launches Waze navigation to the POI. |
HERE Maps | Opens in HERE Maps. |
Custom fields
Custom fields define the structure of POI data inside a dataset. They determine what data entry operators see in the POI form and what the search index covers.
Creating a field
deceased_name). You can override the code manually — once you edit it by hand it stops auto-filling.Editing an existing field
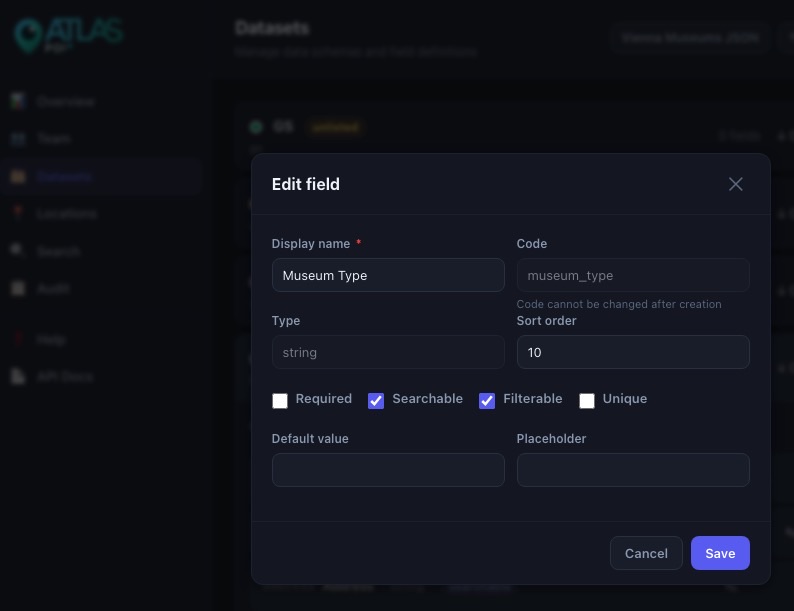
Click the pencil icon (✎) on any field pill in the dataset detail view to open the field editor. You can update:
- Display name — the label shown in POI forms and search results
- Required / Searchable / Filterable / Unique flags
- Default value and Placeholder
- Sort order — controls the order fields appear in forms and results
Creating and editing POIs
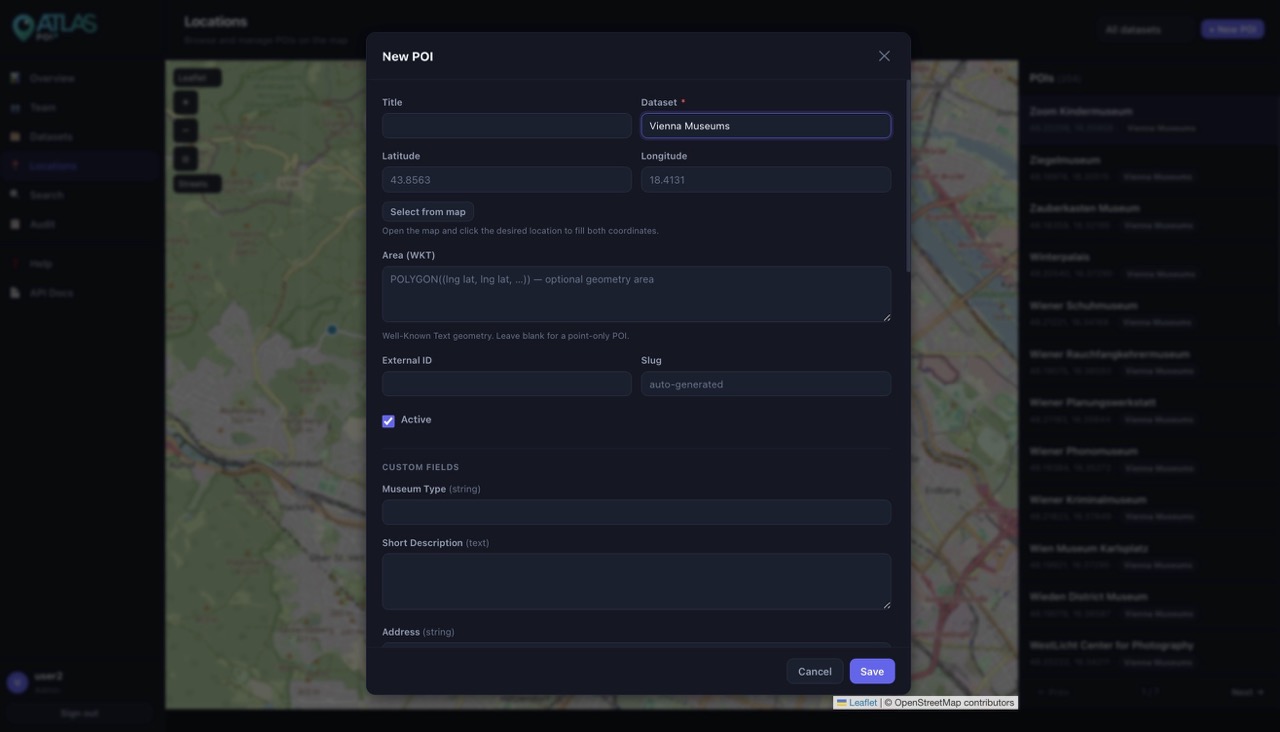
POIs combine geometry, free metadata, and dataset field values. When you create or edit a POI, the selected dataset determines which custom fields appear in the form.
- Last-used dataset is pre-selected. When you open the new POI form, the dataset dropdown defaults to whichever dataset you last saved a POI into. This saves time during bulk data entry sessions.
- Title is the operator-facing label. Keep it concise and unique enough to find quickly in search.
- Custom fields appear automatically once a dataset is selected. Required fields are marked with a red asterisk.
- Area (WKT) is optional. Use it when the POI represents a polygon or area rather than a point.
- Metadata JSON is a free-form object for values that don't belong in structured dataset fields.
QR code in the edit form
When editing an existing POI, a QR code section appears at the bottom of the form. It shows:
- A 120×120 QR code image ready to scan or screenshot for printing.
- The full shareable link (e.g.
https://yourdomain.com/p/abc123…). - A Copy link button to copy the URL to the clipboard.
The redirect destination is controlled by the dataset's QR redirect target setting — see section 3 and section 10 for details.
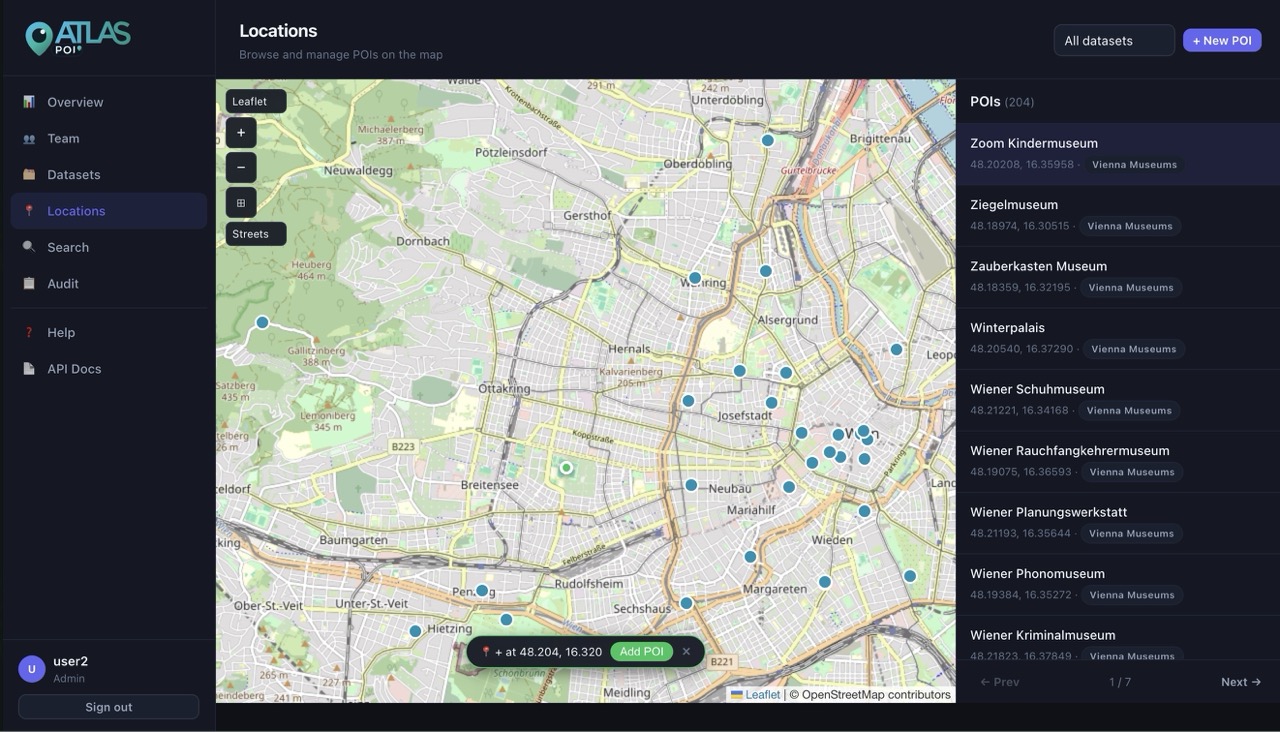
Map controls
The Locations tab contains a full-screen MapLibre map alongside the POI list. All map controls are in the top-left overlay.
Zoom and fit controls
- + / − buttons zoom in and out one level at a time.
- ⊞ Fit fits the map to show all visible POIs. If no POIs are loaded it resets to the default view.
Layer switcher
Use the dropdown in the top-left to switch between four tile layers:
| Layer | Best for |
|---|---|
Streets | General navigation and address-level work |
Light | Clean background that keeps POI pins visible |
Terrain | Topographic relief and rural areas |
Satellite | Aerial imagery for field verification |
Click to set coordinates
When no POI form is open, clicking anywhere on the map drops a marker and shows a chip at the bottom of the map: + at 43.856, 18.413. Clicking the chip opens the new POI form with those coordinates already filled in. Dismiss the chip by clicking it once to cancel without opening the form.
When a POI form is already open and the Select from map button has been pressed, the next map click writes directly to the latitude/longitude fields in the open form.
Map markers
All POIs with coordinates are shown as color-coded dots on the map, grouped by dataset color. Clicking a marker selects the corresponding row in the POI list and flies the map to that location.
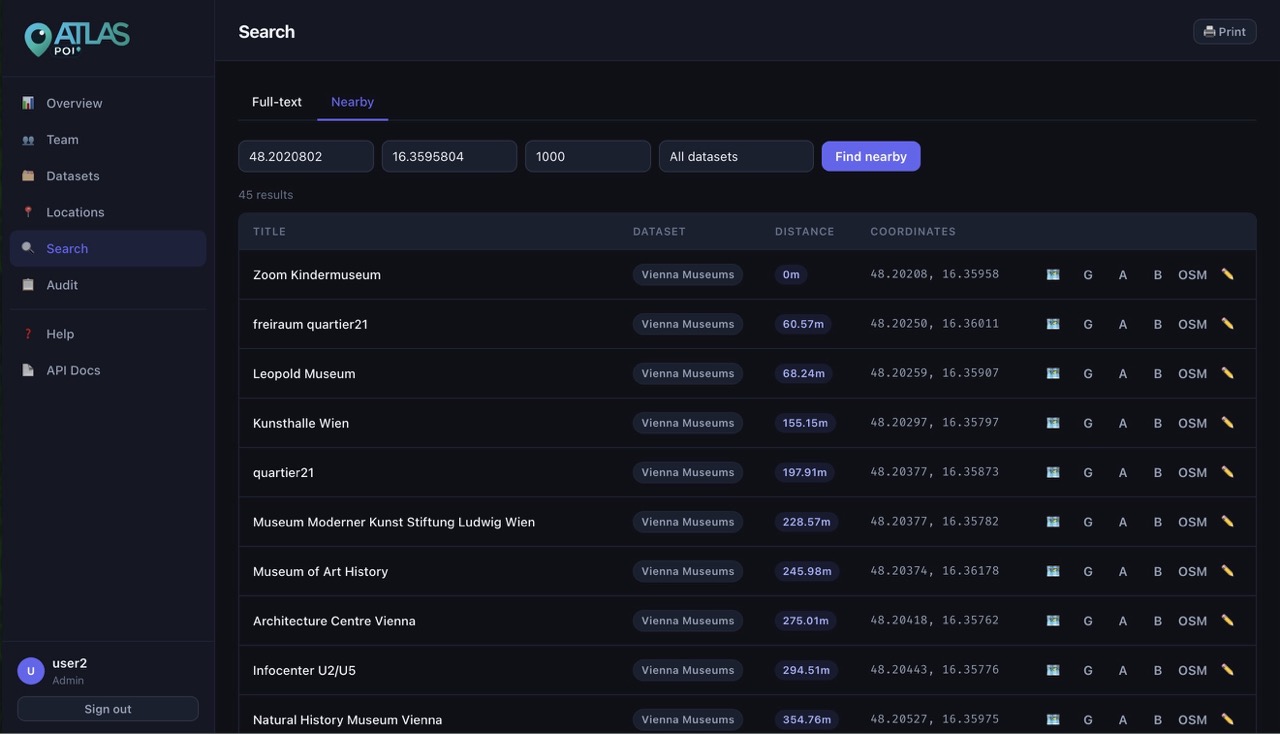
Search
The Search tab supports full-text search across POI titles and all searchable dataset fields, with a 30-result paginated table and per-row action buttons.
Comma-separated OR search
Separate multiple search terms with commas. Atlas treats each term as an independent OR condition and returns any POI that matches at least one of them.
Ahmed, Ali, Mustafa returns POIs whose title or searchable fields contain Ahmed or Ali or Mustafa.Field values in results
Each result row displays the matched POI's searchable field values as small tag chips below the title, so operators can confirm the right record without opening it.
Pagination
Results are paginated at 30 per page. Use the Previous / Next controls below the table to move between pages.
Row action buttons
| Button | Action |
|---|---|
| 🗺 Show on map | Switches to the Locations tab and flies the map to that POI. |
| 📍 Nearby | Runs a proximity search centered on that POI's coordinates. Useful for finding duplicates or related records. |
| ✏️ Edit | Opens the POI edit modal directly from the search result. |
| 🖨 Print (header) | Sends the current search results table to the browser print dialog. |
CSV import and export
CSV import is best for initial bulk loading or batch updates prepared outside Atlas. CSV export is useful for review, cleanup, and backup snapshots.
- Standard columns recognized:
title,slug,external_id,latitude,longitude,area_wkt,is_active. - Columns whose name matches a dataset field code are mapped to that field automatically.
- Unknown columns land in the POI
metadataJSON object. - Rows with errors are skipped and reported in the import result — no partial writes.
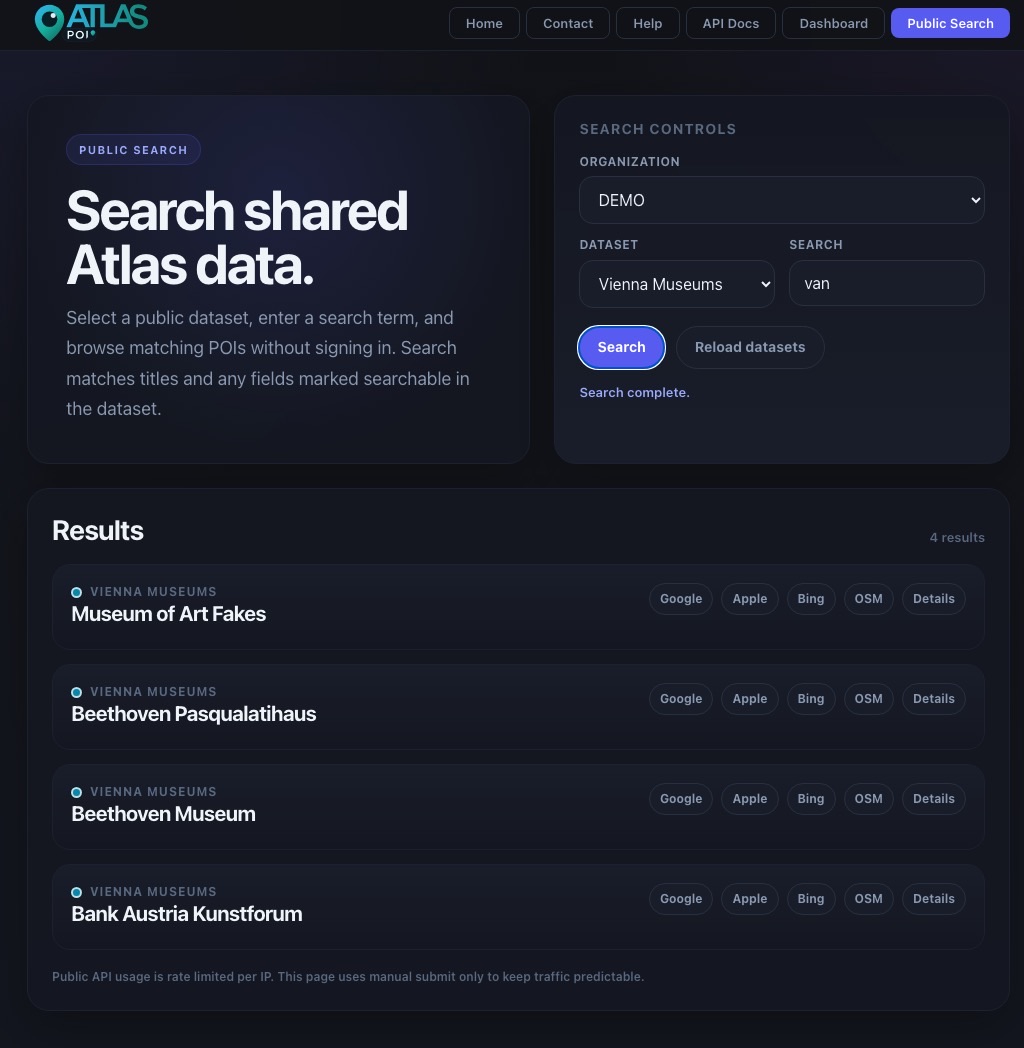
Public search page
The public search page at /atlas.html requires no authentication. It only shows datasets marked public and is intended for controlled public lookup scenarios.
- Users first choose an organization from the dropdown.
- They then choose one public dataset or search across all public datasets for that organization.
- Search supports comma-separated OR terms, the same as the dashboard Search tab.
- Each result row shows searchable field-value tags and action buttons (open in maps, expand details).
QR codes and public detail pages
Every POI automatically receives a unique, stable QR hash when it is first created. This hash powers a scan-and-redirect workflow for physical signs, labels, or printed materials.
How the redirect works
https://yourdomain.com/p/{hash}. You can screenshot the code image or use the Copy link button to get the URL for a QR generator of your choice./p/{hash}. The server immediately looks up the dataset's QR redirect target setting.The public detail page (/p.html)
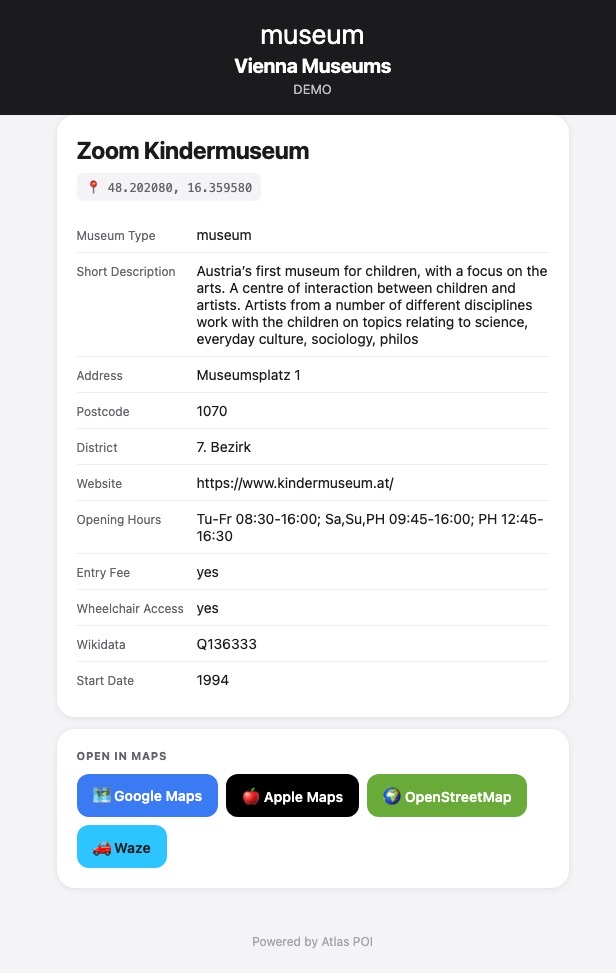
When the dataset's QR redirect target is set to Detail page (or the POI has no coordinates), the visitor lands on a clean, mobile-optimised detail page that shows:
- The dataset icon, name, and organization name in a branded header (using the dataset color).
- The POI title and coordinates.
- All custom field values for that POI.
- Open in maps buttons for Google Maps, Apple Maps, OpenStreetMap, and Waze — visible only when the POI has coordinates.
- An Atlas footer with a link back to the main site.
Direct map redirect
If the dataset's QR redirect target is set to a map provider (Google Maps, Apple Maps, OSM, Waze, or HERE), the visitor is sent directly to that map at the POI coordinates — no Atlas page in between. This is ideal for navigation use cases where speed matters.
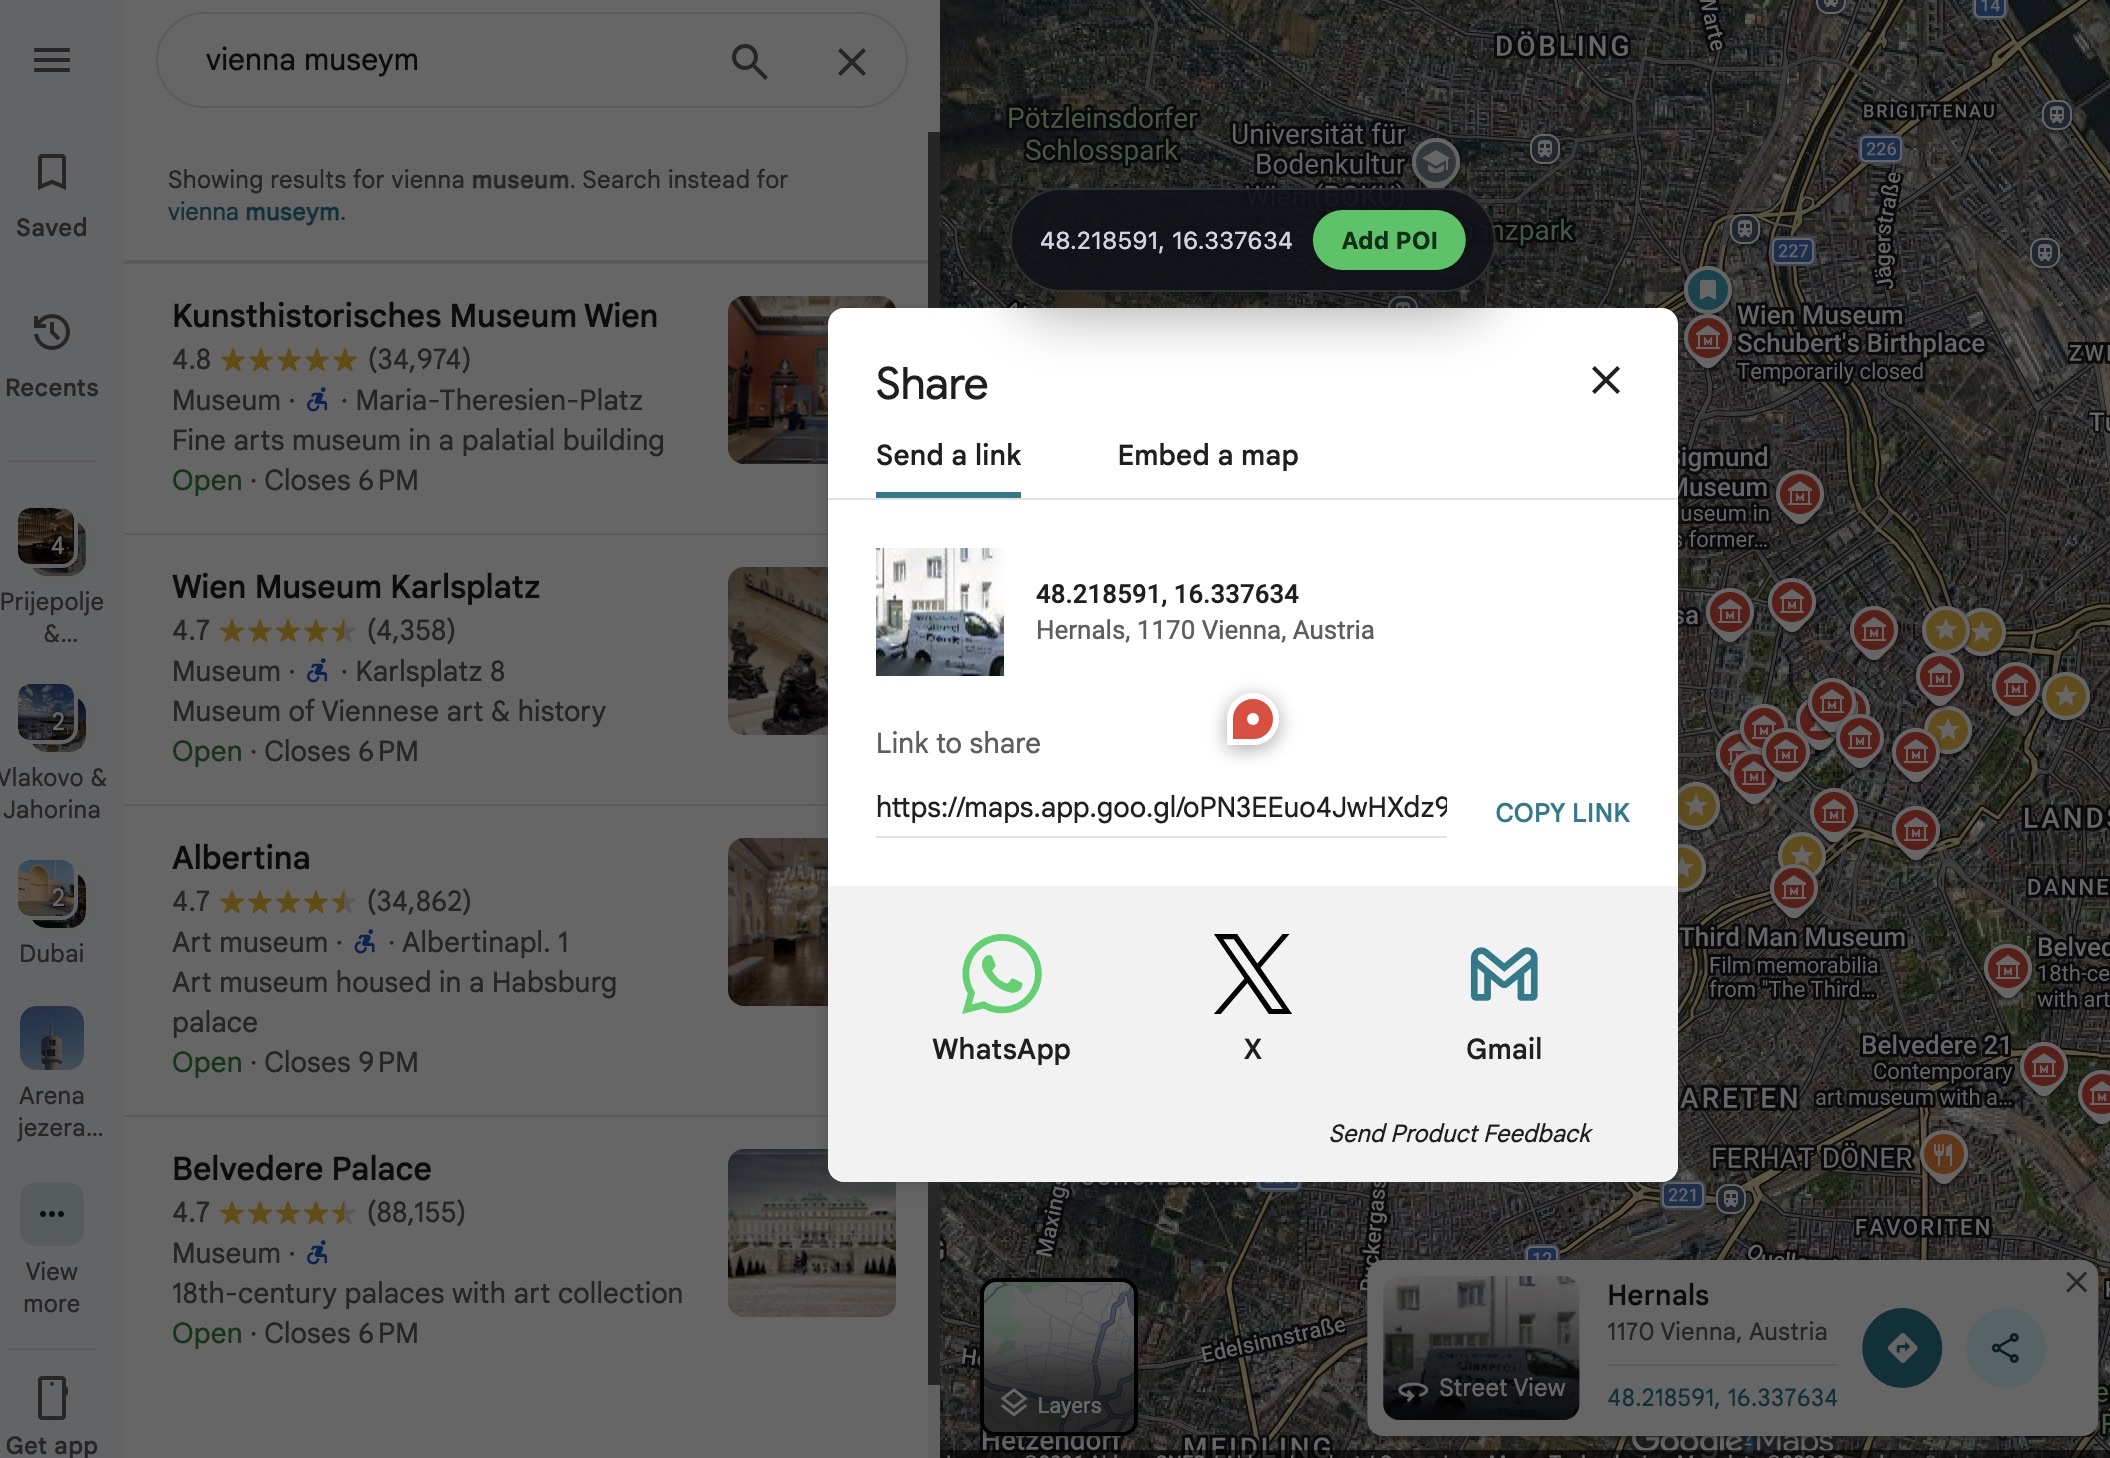
Google Maps bridge
The browser extension bridge is for faster point capture from Google Maps. It reads coordinates from the share dialog and opens the Atlas POI form pre-filled.
Operational tips
- Define your dataset structure and fields before large imports. Field codes are permanent.
- Use dataset colors consistently — color-coded map pins make validation much faster.
- Prefer structured dataset fields over dumping important values into metadata JSON. Structured fields are searchable; raw JSON is not indexed.
- Use
publicvisibility deliberately. Once public, records are searchable without authentication from/atlas.htmland the API. - Set the QR redirect target before printing physical labels. Changing it later will silently re-route all existing QR codes for that dataset.
- Use Detail page mode when the audience is general visitors who may want to see all field data. Use a direct map redirect when the audience already knows where they're going and just needs navigation.
- After a large import, run a comma-OR search with a few expected values to spot-check that field data arrived correctly.
- The ⊞ Fit button on the map is the fastest way to confirm that imported coordinates landed in the right region.